Pressure grooming
Pressure grooming techniques are used to flatten and open up the folds and the fold crossings in your skin.
By putting pressure on the flesh, you can gradually crush them to nothingness.
This applies to any hardened structure or deterioration that you find in your skin.
Pressure grooming is used to cure aches and pains, to solve aesthetic problems, to restore nervous and blood circulation, ...
Pressure grooming theory
On your body, some cutaneous folds and their crossings have become permanent.
These formations are held in place by
coats of epidermis cells, and keep on growing and deepening inside your skin as more coats are added.
Even if they've become extremely hard, these deformations are unstable and collapsible.
They can be flattened with your nails.
You have to find;
• The exact spots to apply pressure,
• The right angle for your finger,
• The right amount of force you should exert.
When your nail is precisely in the center of a skin flaw, putting moderate to high pressure on it will open it up and crush its foundations.
Your goal is to flatten each structure over time.
Pressure points are misidentified fold crossings
Pressure points, used in traditional Chinese and Indian medicine, massage, acupuncture, ... are simply misnamed fold crossings.
These therapies have understood that pain comes from those places.
But, they don't realize that the skin is simply folded in those spots.
So, they use their hands, fingers and needles to put pressure on them with poor results.
In fact, you have to use your hard nails to crush an open up the fold crossings.
When properly groomed with pressure strokes, fold crossings can be completely eliminated.
Associating these fold crossings with ailments all over the body is silly and wrong.
On this page
Basic pressure stroke information
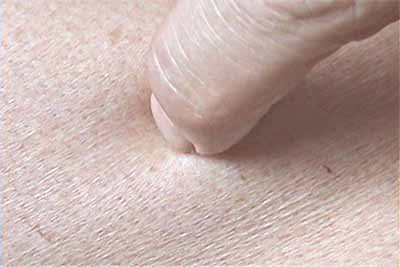
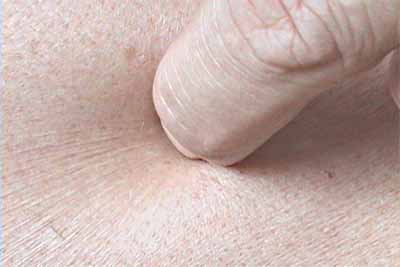
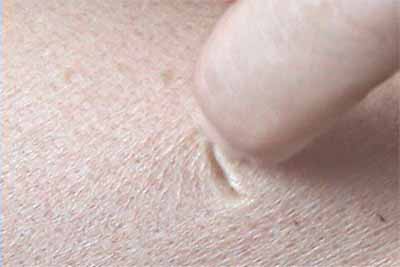
A pressure stroke in three steps
you'll hurt yourself.
Stay where you are!
Pressure strokes are easy to perform.
They are three step operations that can last anywhere from half a second to around twenty seconds.
| STEP 1 |
 |
| STEP 2 |
 |
| STEP 3 |
 |
Repeat this procedure over and over.
Differentiating folded and unfolded skin
Your first goal, when you start pressure grooming your skin, is to find folds and fold crossings.
Your skin is not folded everywhere.
When your nail lands on your skin, there are 3 possibilities.
It falls on:
• Unfolded skin,
• A fold,
• A fold crossing.
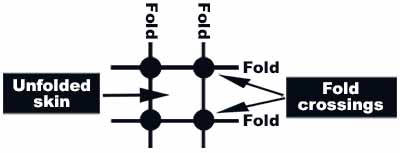
You don't know where your nail will land when you start grooming.
The major difference between folded and unfolded skin is hardness.
As you peck your skin with your nail, you'll feel some rigidity inside your skin in some sectors.
This is the firmness that you want to crush away with pressure grooming strokes.
Short and long pressure strokes
Pressure strokes can be divided into three categories;
• Pecking strokes; lasting one second or less,
• Short pressure strokes; lasting up to four seconds,
• Long pressure strokes; lasting four seconds and more.
Liberation feeling
Most pressure strokes bring a liberation feeling.
It's produced by the skin when it's being freed from the hold of the folds.
Of course, your flesh will generate all kinds of other stimuli, but you have to concentrate on low level ones.
Your skin is so happy that you're grooming it that it emits a pleasant sensation.
I've called this feeling "unpain".
Let this gratifying sensation be your guide as to where you should place your next pressure stroke.
How much pressure should you apply?
Your goal, while pressure grooming, is to crush and open up hardened formations inside your skin.
If you're not crushing them; you're not putting enough pressure.
You want to exert all the force you can without hurting yourself.
Pressure grooming, when you don't put enough pressure, becomes too slow and time consuming.
Your nail has to penetrate your skin deeply, while trying to reach the bottom of the fold or fold crossing.
Then, you have to slowly increase the pressure, as you feel your nail penetrating and flattening the hardened structure.
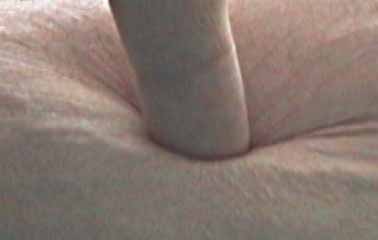
The skin of different parts of your body may react differently to pressure grooming.
Go slowly at first and test each region to see how far you can go.
Nail marks
Your nails will leave marks on your skin, but they should fade away rapidly.
In most circumstances, they should be gone in 10 minutes.
However, if you groom an overly sensitive patch of skin or if you apply too much pressure, the marks can take days to disappear.
You have to regularly inspect your skin for damages after grooming it.
Let the nail marks heal completely before working on an area again.
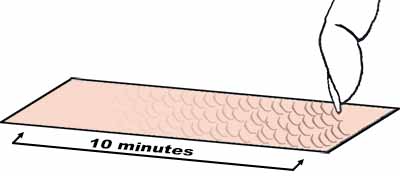
I can pressure-groom my skin for hours and meet people afterwards.
If nail marks remain a problem for you; don't conclude that your skin cannot be groomed; refine your technique instead.
Use the nail or the fingertip?
| USING THE NAIL |
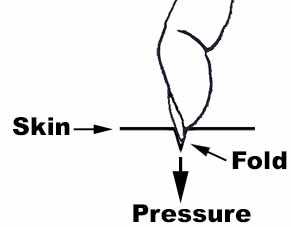 |
Using your nail to groom your skin lets you put lots of pressure on a specific spot and permits very precise work.
The same pressure applied with your fingertip will impact on a larger area, but there is less risk of damaging your skin.
You can also use both the nail and the fingertip simultaneously.
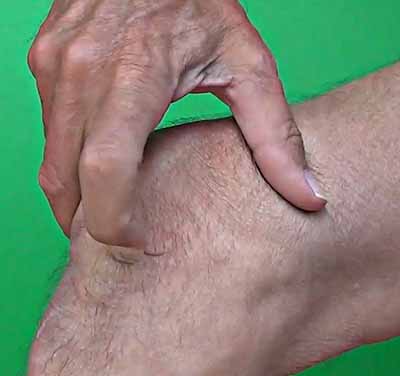
Your nails play an essential part of your grooming work.
You'll have to use them over 90% of the time.
Only your nails have enough rigidity to crush and open up hardened skin.
Finger strokes are much less effective than nail strokes.
Use them on delicate regions or in places where the skin unfolds so easily that no nail is needed.
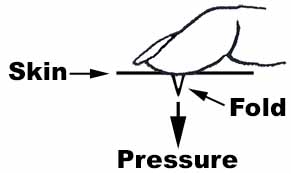
Finger strokes use the tip or the side of your finger to perform the grooming tasks.
No nail is involved at all.
Simply apply pressure on your skin with the flat of your fingertip.
Your finger acts as an iron would on clothes.
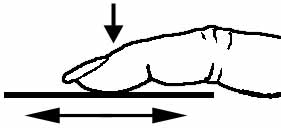
Move your finger nearby.
Re-apply pressure.
Unfolding can occur even if very little pressure is applied.
Pressing can be done with any part of the finger, even in conjunction with nail strokes.
The side of the finger may also be used to pry and pull on the skin.
Finger strokes are particularly effective underwater or when your skin is wet.
The jerk
At the end of a grooming stroke, your nail is often lodged deeply into your skin. You can simply remove your nail.
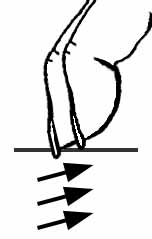
Or, you can give a final attack by swiftly twist-pulling the nail out of the fold crossing.
The jerk is an optional and violent ending to your pressure strokes.
You mostly use it when your stroke has reached a point of resistance that hampers any further movement.
How to perform pressure grooming
Pressure grooming strokes are very easy to perform.
•1 Place your nail on your skin,
•2 Press your nail into your skin and apply pressure;
• For 1 second (pecking),
• For 1 to 4 seconds (short pressure stroke),
• For 4 seconds and more (long pressure stroke),
•3 Retract your finger,
•4 Start over immediately, almost at the same place.
Blindly searching for fold crossings
Most people will have a hard time detecting and following cutaneous folds.
Finding folds in your skin is not an easy task, but locating fold crossings is still more difficult.
That's because you can't use your sense of sight to identify them.
Only a few fold crossings on your body can be spotted visually.
So, all your information comes from your nails, your fingertips and from the skin you're working on itself.
Humans are visual animals; they rely on what they see, and they have trouble getting around in the dark.
Finding your way inside your skin and identifying cutaneous structures will always remain a challenge.
You may work for hours on one spot, while the place you should be grooming is just on eight of an inch away.
Three types of pressures strokes
You use different pressure strokes depending on how hard the skin is:
1• Pecking strokes: on soft unfolded skin,
2• Short pressure strokes: on hardened skin,
3• Long pressure strokes: on the center of hardened skin.
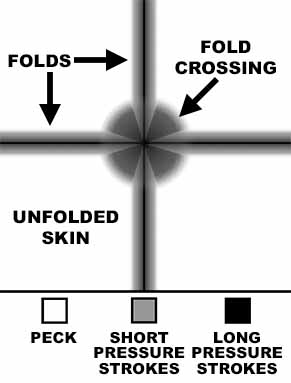
Wherever your nail falls, you always want to start by pecking the area you want to work on.
Once you've discovered some hardened structures inside your skin; you slowly increase the pressure you apply and the duration of each pressure stroke.
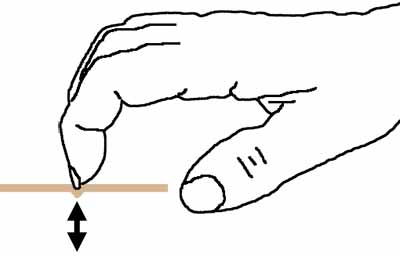
1• Pecking strokes (1 second long)
Pecking strokes are very short pressure strokes typically lasting about one second.
You press your nail(s) in and out quickly without applying too much pressure.
To perform pecking strokes:
•1 Place your nail(s) on your skin,
•2 Press your nail(s) into your skin,
•3 Retract your nail(s) immediately,
•4 Start over almost at the same place.
When you groom your skin with pecking strokes; two things happen:
• Your skin gets plowed and rejuvenated,
• You feel what's inside your skin.
Pecking strokes to rejuvenate the skin
All your life, you haven't touched your skin.
For some reason, humans think that touching their skin is no good and they don't do it.
Like the earth of a neglected garden, untouched skin becomes hard and ugly.
Pecking your skin is like plowing it back to life.
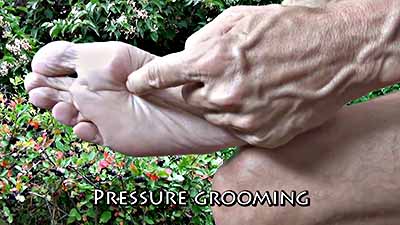
Use four-finger grooming techniques and both hands simultaneously to get the job done faster.
You'll still have to use single-finger strokes in areas where the skin is delicate and where four fingers won't fit.
Pecking your skin may also be necessary to break apart a coat of hardened surface cells that prevents you from properly grooming the skin.
Your skin will love being pecked.
Pecking strokes to feel what's inside your skin
While pecking your skin, don't let your brain go idle.
Use the sensory information you get from your nails, fingertips and from the skin itself to map out any cutaneous structure you find inside your skin.
For more information; see the Feeling and imaging what's inside your skin section below.
2• Short pressure strokes (1 to 4 seconds long)
To perform short pressure strokes:
•1 Place your nail(s) on your skin over a fold or a fold crossing,
•2 Press your nail(s) into your skin,
•3 Increase the pressure while crushing, prying open and pulling on the fold or fold crossing,
•4 Start over almost at the same place.
Short pressure strokes lasting one to four seconds are, by far, the grooming technique you should use the most.
They are performed repeatedly and in large numbers; in one minute you can execute thirty individual two second pressure strokes.
These short pressure strokes are usually located very close to each other, as you try to crush a particular skin structure.
In fact, you can place hundreds of short pressure strokes on the almost the same spot without harming yourself.
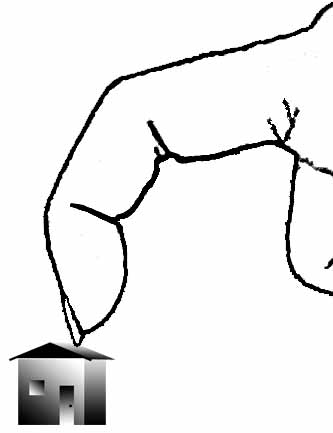
Even if you wanted to groom the exact same spot; your nail will always fall on a slightly different location and with a slightly different angle.
You want to crush any hardness you meet in your skin, while searching for the center of a fold crossing; a weak spot of the skin feature you're working on.
Each stroke you execute brings a wealth of information about the cutaneous structure you are trying to flatten:
• It's size,
• It's shape,
• It's angle,
• How hard the skin is in some areas,
• ...
Use this knowledge to plan the next stroke, as you correct your aim and angle.
3• Long pressure strokes (over 4 seconds long)
To perform long pressure strokes:
-Prerequisite: you've located the center of a fold crossing.
•1 Place your nail(s) on the center of a fold crossing (often a hole or a bump) or in a fold,
•2 Press your nail(s) into your skin,
•3 Freeze your hand position; don't move at all,
•4 Slowly increase the pressure on your nail(s) and be attentive; you will feel your skin open up, while your nail(s) dives deeper and deeper,
•5 Only relieve the pressure when you feel you've reached the point where no more crushing can occur.
Long pressure strokes are special and very rewarding.
They provoke sensations that you've never felt before; so they may go unnoticed.
With them, you can get rid of your fundamental skin features or defects.
Yet, performing them is not an obvious procedure.
Yes, you simply maintain the pressure on the skin for a long time; but feeling the unfolding, deep inside your skin, takes some effort and concentration.
When should you perform long pressure strokes?
You can only perform long pressure stroke once you've found the center (weak spot) of a fold crossing.
Always start with pecking strokes, then use lots of short pressure strokes and only apply long pressure strokes when you're lucky enough to find the center of the fold crossing.
See the instructions below on how to make a mental image of the hardened skin formations you encounter.
You don't move during a long pressure stroke
Long pressure strokes are exceptional strokes and you don't act as you would for short pressure strokes.
You don't move!
At most, you can tilt your finger to change the angle.
When you realize that your nail or fingertip is just in the right place;
• You think "Wow, I've found the spot. I've got this fold crossing cornered".
• You freeze your position completely. You don't move at all.
• You increase and maintain the pressure for as long as you think it's effective.
You won't succeed most of your long pressure stroke attempts
Even when you think that you've found the right place to apply a long pressure stroke, many factors can go wrong and prevent you from finalizing your stroke.
The main reasons are:
• Your nail slips away,
• The skin is unstable,
• The pain is too intense.
What often happens is that your nail slides away from its original position and this ends your stroke.
In fact, it may be very difficult to apply long pressure strokes on some parts of your body.
In any case, don't let these botched attempts stop you from performing long pressure strokes in those places.
Feeling the unfolding requires attentiveness
Concentrate your awareness on very faint signals emanating from the bottom of the compressed area.
Devote all your attention to these low intensity stimuli.
The two main sources of sensitive information are:
• Your nail diving very, very slowly deeper into your skin.
• The structure you are crushing giving-in very, very slowly.
These perceptions do not appear during the initial seconds of a long pressure stroke.
Once you feel the unfolding; use it to guide your finger's angle.
Only stop applying pressure when you feel that the skin is no longer unfolding.
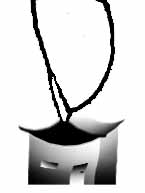
| DON'T MOVE Freeze your hand position |
 |
Grooming bumps and mounds, holes and depressions
Differentiating open and closed fold crossings
The bumps, holes and rigid structures that you find in the skin of your body and face may look dissimilar, but they're just different presentations of the same phenomenon; fold crossings.
The key to grooming them away is to find their center; the place where the four corners of the fold crossing meet.
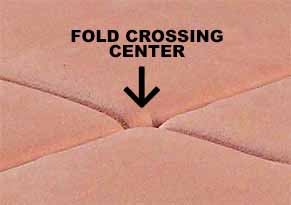
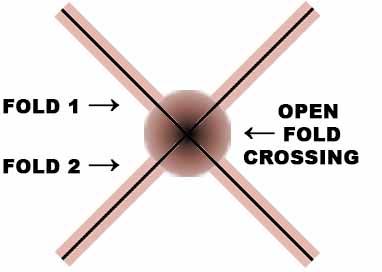
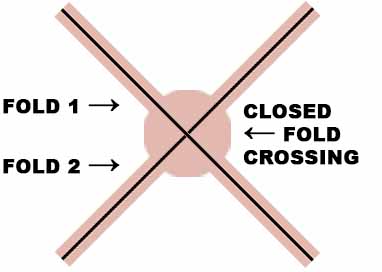
The main difference between various fold crossings can be found in their openings.
You can distinguish two categories:
• Open fold crossings,
• Closed fold crossings.
Seen from above
Seen from above
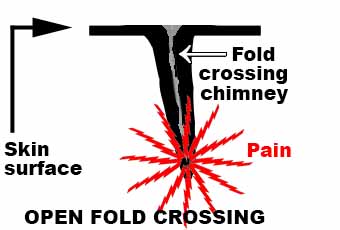
The fold crossing chimney
At the point where the four corners of a fold crossing meet, a void, a cavern is formed.
As the folds deepen with age, so does the cavity in the center.
With time, a chimney is created.
Side view cutaway
Side view cutaway
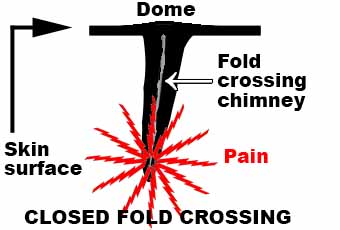
As your continued actions force the formation of new epidermis cells, fold crossing chimneys keep on elongating all your life.
They bore into the muscles and organs beneath them, they enter every little crevice in your articulations.
Fold crossings anchor the skin to whatever is beneath them.
Once this is done, any movement you make, that pulls on the skin, will be restricted, and pain, often acute, may appear.
Attacking both the highest summits and the lowest depressions
Since fold crossings form holes and bumps, an easy way to find them with your nail is to search for depressions and elevations in your skin.
Focus on places where the skin isn't flat and plane.
Then, when you locate a skin defect, place your nail on the lowest point of a hole or the highest point of a bump, and apply all the pressure you can.
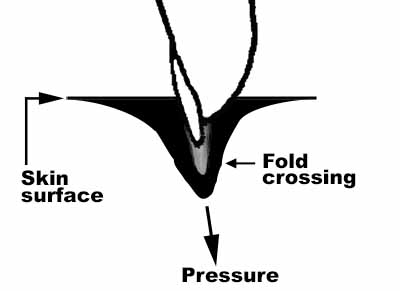
| Holes and depressions |
|
Your goal is to place your nail at the lowest point you can reach in a hole or depression and apply pressure there.
It's the bottom of the cavern that you want to crush.
As your nail penetrates deeper into the cavity, it will also force the walls of the fold crossing to open up.
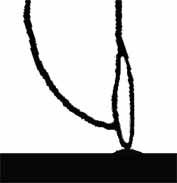
| Bumps and lumps |
|
You want to locate the peak of these formations; the spot where they are most vulnerable.
The skin at that particular place is the hardest; so you're also searching for rigidity.
• When you locate a bump, evaluate its size and form and search for its center, generally its highest point.
• Position your nail and press down.
• Hold the pressure while adjusting your angle.
These mounds aren't solid.
They're actually made out of four sections.
When your nail is exactly at the right place, applying lots of pressure will split the fold crossing in two, then in four.
You will feel your skin open up as you increase the pressure.
Crush any structure or hardness that you meet in your skin by placing your nail on its highest peak.
When you discover pain
so you can groom it.
The great majority of your pressure grooming strokes should be pain free.
Yet, you will often find places that hurt when you press on them.
In some place the pain can be intense.
Don't let the pain stop you from grooming these areas.
The ache comes from the bottom of folded skin formations.
You'll notice that, as soon as you apply pressure, your skin immediately reacts by anesthetizing the area you are grooming.
The pain subsides and you can groom the area.
Any tension you remove from those spots, by forcing them to open, will lessen the pain you feel afterwards.
Feeling and imaging what's inside your skin
Mapping your skin
The skin defect you're trying to groom away has its own specific shape, size, hardness, orientation, ...
It's essential to have a mental representation of the object you want to unknot.
When you press your nail on it and all around it, you can obtain and gather a lot of information about it.
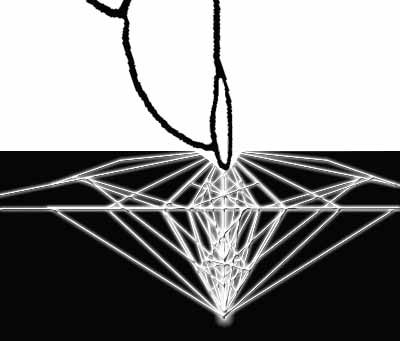
If your nail or fingertip push into the flesh easily and without hindrance; then, it's not folded.
But, if you feel any irregularity or hardness in the skin; those are folds and their crossings.
These structures are unstable, but they've hardened with years of inattention.
You can crush them away with your nails.
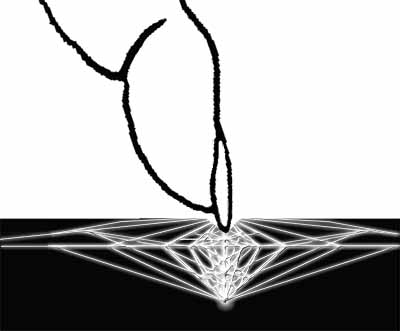
Pecking to feel what's inside your skin
As soon as you press your nail unto your skin, you form a mental picture of what lies beneath the surface.
The idea is to repeat this gesture over and over to map out the bumps and valleys below the skin's surface.
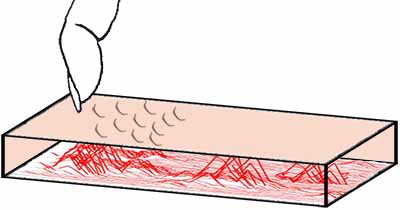
You will discover all kinds of weird cutaneous formations; a world of mountains and deep pits.
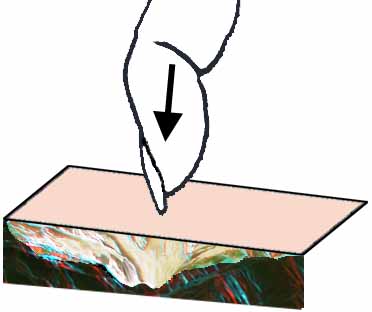
Orienting your nail
Skin formations are usually made out of four sections tightly held together.
This creates a void where they meet, some kind of chimney.
It drives into the skin, but not necessarily straight down.
• Try to feel where the bottom of the crossing you are grooming is.
• Reorient your finger and nail so that the pressure you apply is in line with the chimney.
• Aim for the bottom.
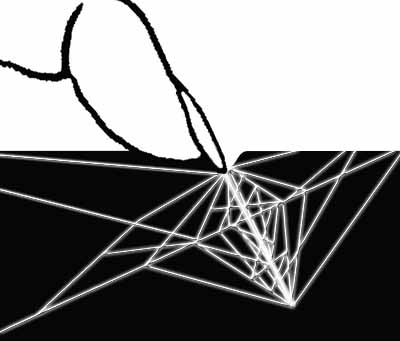
If you are precisely positioned on the center of a crossing, you'll feel its chimney open up, as your nail penetrates it.
Four-finger pressure grooming
Most of the time, you should use only one finger for your pressure grooming strokes because you have to put all your attention and agility on the task you are performing.
However, when the assignment seems impossible to accomplish with only one finger, you can bundle up to four fingers together.
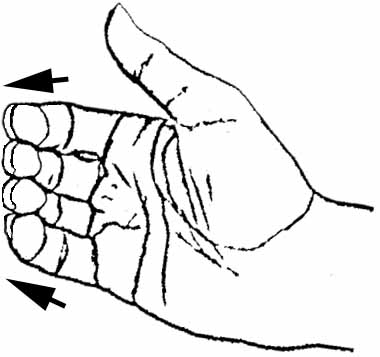
This position gives you a powerful grip on your skin.
Use it on large folds and on diffuse pain.
Painful areas often follow long muscle bands.
Place your four fingers along them and press your nails into the aching skin.
This will relieve the tension temporarily, but repeating this gesture will solve the problem in the long run.
More and more pressure
Instead of just relying on the strength of your fingers, you can use the force of your entire arm to pull the nails into the flesh.
In some places, you can even place your thumb on the other side of a limb, so you can grasp it.
Uneven finger use
You normally want to put equal pressure on each finger but, because the skin is so uneven, some nails always do more work.
Since your middle finger is longer, it sometimes takes the lead and blurs the distinction between single and four-finger grooming.
It could also be called “two-finger” or “three-finger” grooming depending on the situation.
Your strokes will benefit if you practice individual control over each finger’s action.
Some fingers press in deeply while others open up the fold more.
Two-handed pressure grooming
Pressure strokes, using one to four fingers, that are executed with both hands simultaneously give you the most punch.
They're very powerful and effective, but you may hurt yourself if you exert too much strength.
Only use them after you've explored the area with single-finger pressure strokes.
Two-handed four-finger pressure strokes
When you need all your strength to reach deep problem or painful areas; these strokes provide more pressure than any other.
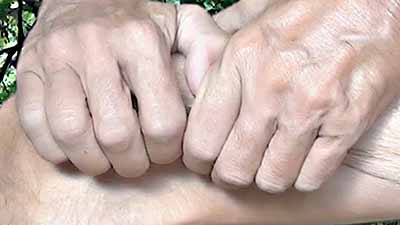
For best results, your strokes on both hands should be synchronized.
• Start with short one-second strokes until you meet a skin imperfection; then lengthen them up to ten seconds.
• In many places on your body, you can use your thumbs (and even the palms of your hands) to grasp the member you're grooming.
|
|
Next page
|